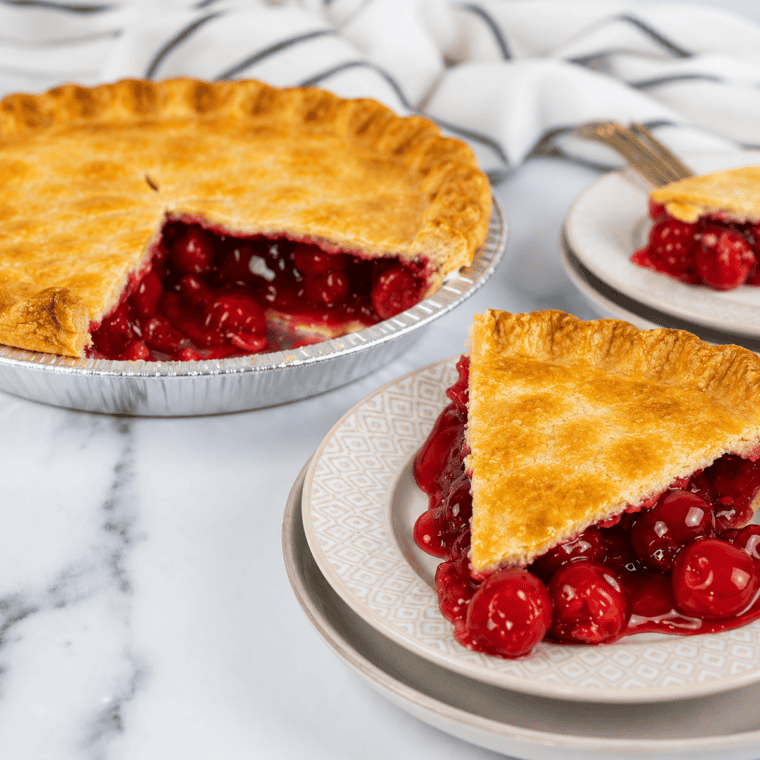
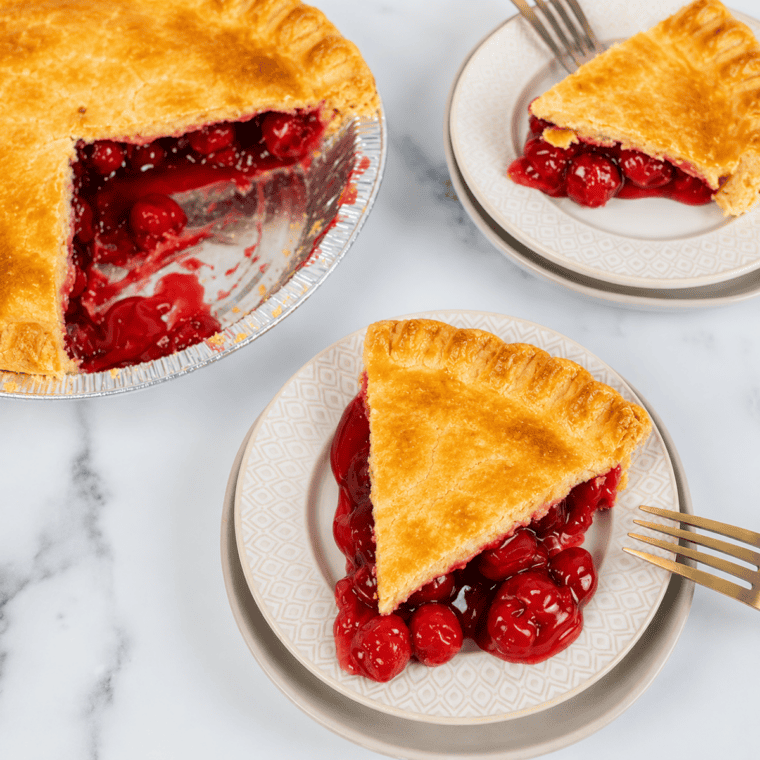
Air Fryer Cherry Pie gives you a golden, flaky crust and a warm, jammy cherry filling in about 40 minutes — no oven required. With just four simple ingredients and a couple of store-bought shortcuts, this is the easiest way to put a bubbling homemade-style cherry pie on the table, whether it’s a holiday dessert or a weeknight craving.

If you’ve never baked a pie in your air fryer before, you’re in for a pleasant surprise: the circulating heat crisps the crust beautifully while keeping the kitchen cool, which makes it perfect for small batches and hot-weather baking.
Love easy cherry desserts? Once you’ve mastered this one, try my Air Fryer Cherry Pie Donuts, Air Fryer Cherry Oatmeal Pies, or Air Fryer Chocolate Cherry Cupcakes next.

Why You’ll Love This Air Fryer Cherry Pie
- Fast and fuss-free. Minimal prep, a short cook time, and no waiting on a full-size oven to preheat.
- Perfectly flaky crust. The air fryer’s circulating heat crisps the top crust to a golden brown that rivals oven baking.
- No oven needed. Ideal for small kitchens, summer days, or anytime you don’t want to heat up the whole house.
- Just four ingredients. Store-bought crust and canned filling do the heavy lifting, so anyone can make this.
- Easy cleanup. One pie pan and the air fryer basket — that’s it.
Ingredients You’ll Need
- Frozen pie crusts — Two crusts (one for the bottom, one for the top). Thawed store-bought crusts keep this recipe quick, but a homemade air fryer pie crust works beautifully if you’d rather make your own.
- Cherry pie filling — Canned filling delivers that signature sweet-tart flavor with zero effort. You can also use a homemade fresh-cherry filling (see the FAQs below).
- Egg yolk — Beaten into an egg wash to give the top crust a rich, glossy, golden finish.
- Milk — A splash mixed into the egg wash encourages even browning and adds a little richness.
How to Make Air Fryer Cherry Pie
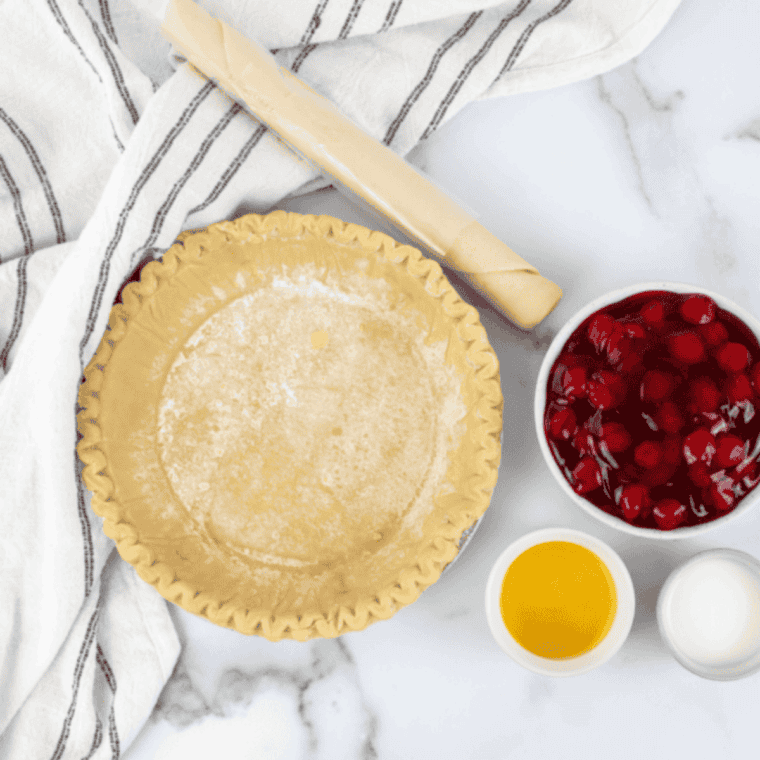
Step 1: Prep the crust. If using frozen pie crusts, let them sit out for about 10 minutes until the dough is pliable. Press one crust into the bottom of a pie pan that fits inside your air fryer basket.
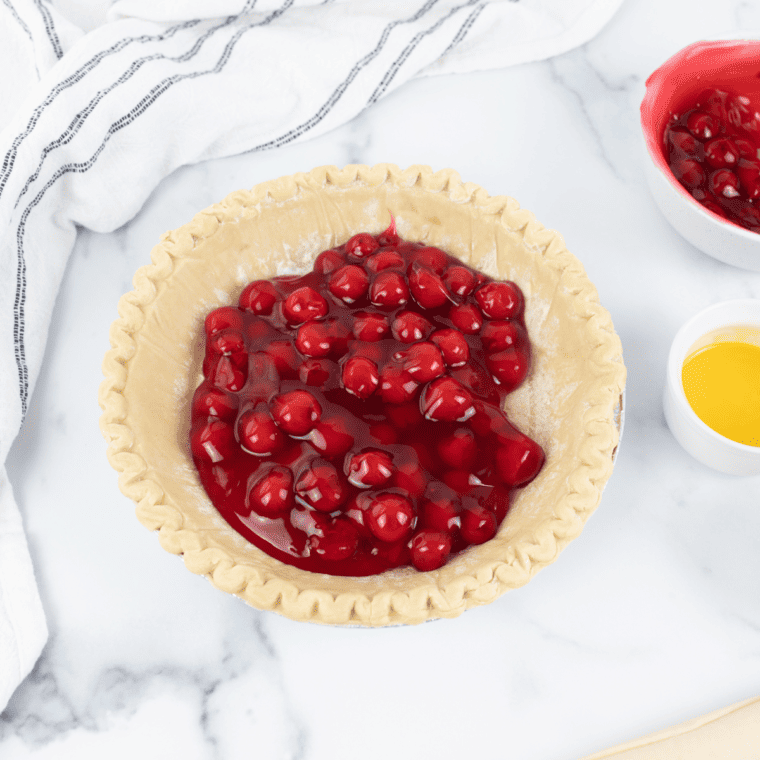
Step 2: Add the filling. Spoon the cherry pie filling into the bottom crust and spread it out evenly.
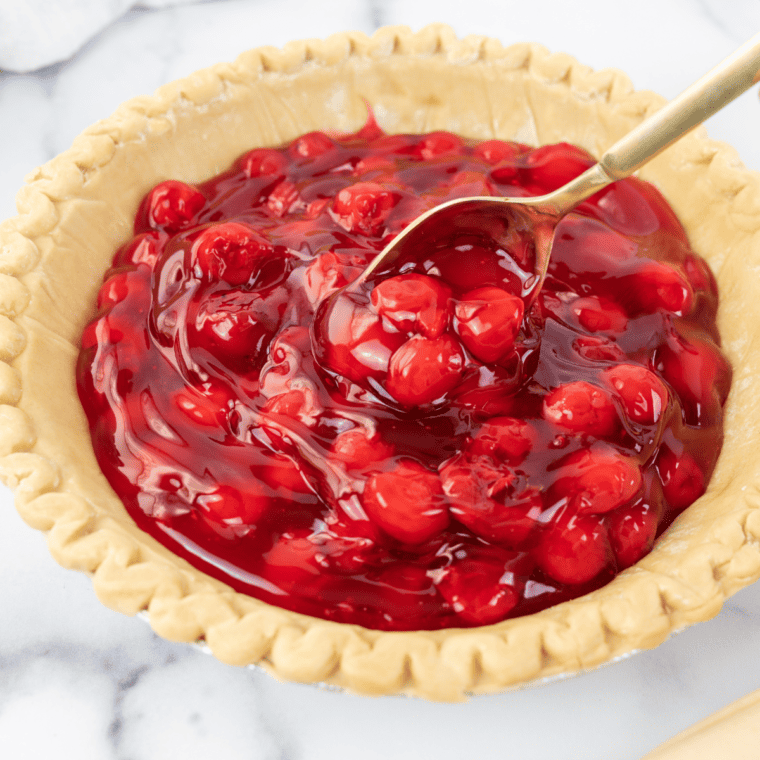
Step 2: Add the filling. Spoon the cherry pie filling into the bottom crust and spread it out evenly.
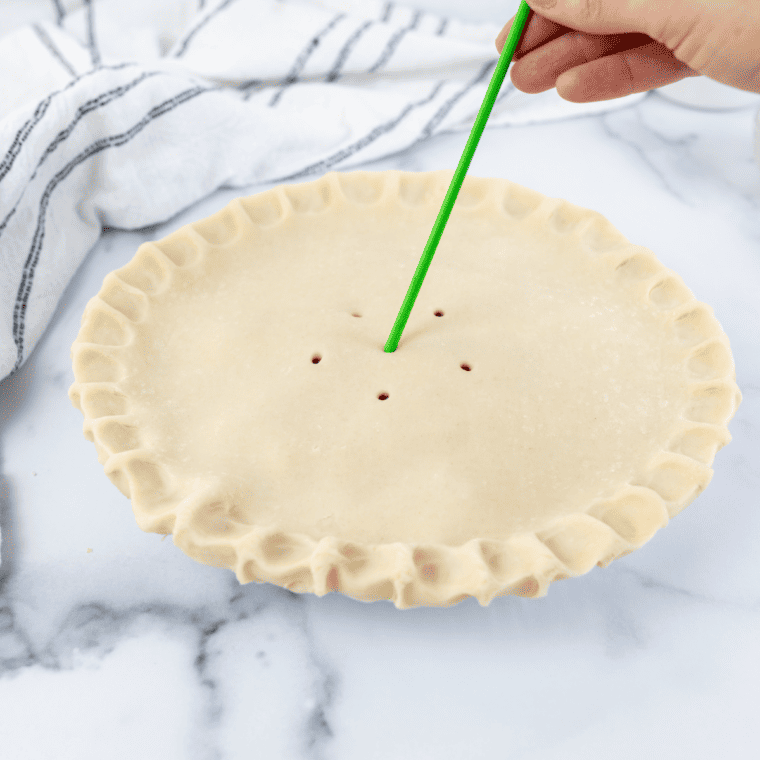
Step 3: Add the top crust. Lay the second crust over the filling. Either seal the edges and cut a few small slits in the top to vent steam, or weave it into a simple lattice if you want that classic bakery look.
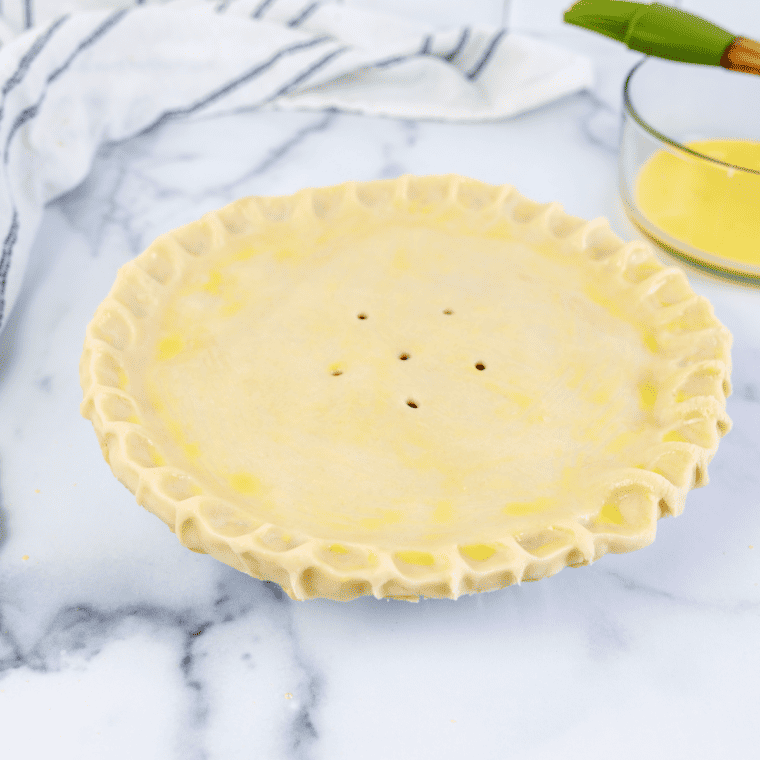
Step 4: Brush with egg wash. Whisk the egg yolk with the milk and brush it over the top crust. This is what gives the pie its beautiful golden color.

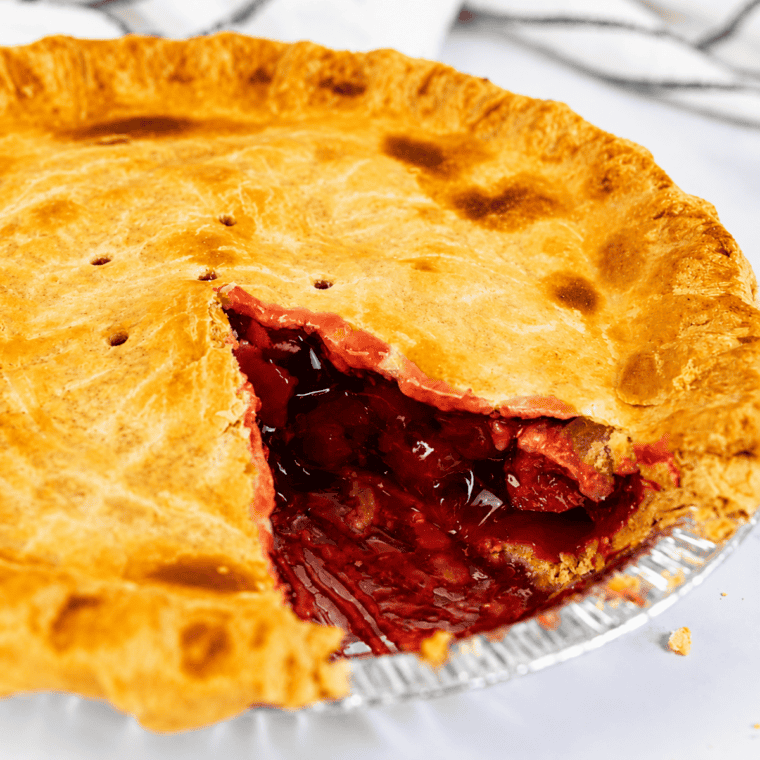
Step 5: Air fry. Carefully place the pie into the air fryer basket and cook at 310°F (155°C) for 10 minutes. Check it, then continue in short intervals until the crust is light golden brown and the filling is bubbling — usually about 5 more minutes. Exact timing depends on your air fryer’s wattage and how thick your pie is.
Step 6: Cool and serve. Let the pie cool for a few minutes so the filling can set before slicing. Serve warm with a scoop of vanilla bean ice cream or a dollop of whipped cream.
Expert Tips for the Best Air Fryer Cherry Pie
- Use a pan that fits. Measure your air fryer basket first. Many standard pie pans fit once you remove the basket, but a smaller pan gives you the most flexibility.
- Keep the crust chilled. Whether store-bought or homemade, cold dough holds its shape and bakes up flakier.
- Don’t skip the egg wash. The egg yolk and milk mixture is the difference between a pale crust and a glossy, golden one.
- Rotate if needed. Air fryers can run hot in spots, so rotate the pie halfway through for even browning.
- Watch the edges. If the crust browns too fast, loosely tent the top with foil while the filling finishes cooking.
- Let it rest. Cutting in too soon means a runny filling. A few minutes of cooling lets everything set.
Variations to Try
- Fresh cherry filling. Swap the canned filling for pitted fresh cherries tossed with sugar, cornstarch, and a squeeze of lemon juice.
- Streusel top. Skip the top crust and finish with a buttery crumb topping instead.
- Add crunch. Sprinkle honey roasted almonds over the finished pie for texture.
- Make it a sundae. Drizzle warm slices with caramel sauce and add a scoop of ice cream.
How to Store, Freeze, and Reheat
Storing: Cover the cooled pie loosely with foil or plastic wrap and keep it at room temperature for up to 2 days. For longer storage, refrigerate in an airtight container for up to 5 days.
Freezing (unbaked): Wrap the assembled pie tightly in plastic wrap and foil and freeze for up to 3 months. Air fry straight from frozen, adding a few extra minutes to the cook time.
Freezing (baked): Let the pie cool completely, wrap it tightly, and freeze for up to 3 months. Thaw and reheat when ready to serve.
Reheating: Warm slices in the air fryer at 300°F (150°C) for 5–10 minutes to re-crisp the crust. You can also reheat in a 350°F (175°C) oven for 10–15 minutes.
Air Fryer Cherry Pie FAQs
Can I use frozen pie crust? Yes. Frozen crust works great — just let it thaw for about 10 minutes so it’s pliable, then follow the recipe as written.
Can I use fresh cherries instead of canned filling? Absolutely. Pit and slice fresh cherries, then toss them with sugar, cornstarch, and a little lemon juice. The cornstarch thickens the filling as it bakes.
How do I know when the pie is done? The crust should be golden brown and the filling should be bubbling. Check at 10 minutes, then add time in 2–3 minute intervals as needed.
Can I make this pie ahead of time? Yes. Assemble it and refrigerate until you’re ready to bake, or freeze it unbaked and air fry directly from frozen.
What if the crust browns too quickly? Loosely cover the top with aluminum foil so it stops browning while the filling continues to cook.
Can I add a topping? Definitely — a lattice top, a streusel crumb, or a sprinkle of coarse sugar all work well.
What to Serve With Air Fryer Cherry Pie
This pie is a natural match for something cool and creamy. Serve it warm with a scoop of Ninja Creami vanilla bean ice cream or fresh whipped cream for a classic contrast. Add a sprinkle of honey roasted almonds for crunch, or keep it light with fresh berries and a dollop of yogurt.
More Easy Air Fryer Recipes
Looking for your next air fryer win? Try these reader favorites:
- Air Fryer Cherry Dessert Pizza
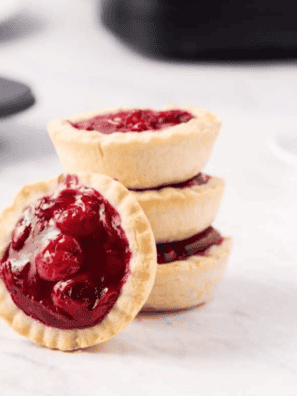
- Air Fryer Cherry Tarts
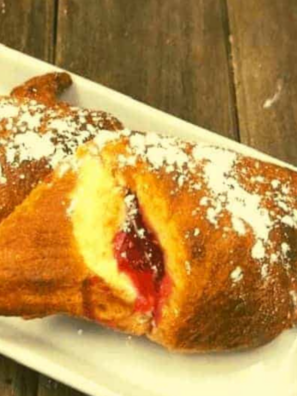
- Air Fryer Cherry Pie Bubble Up
- Air Fryer Valentine’s Day Brownies
- Air Fryer Crispy Crowns
And if you’re hosting, round out the spread with savory bites like Air Fryer Trader Joe’s Salmon Pinwheels or Air Fryer Trader Joe’s Fried Olive Bites.

Air Fryer Cherry Pie Recipe
Description
Ingredients
- 2 pie crusts, frozen, thawed, or homemade
- 42 ounces cherry pie filling
- 1 egg yolk
- 2 tablespoons milk
Instructions
- Leave the frozen pie crusts out for about 10 minutes, until the dough is pliable.
- Press one crust into the bottom of a pie pan and fill it with the cherry pie filling, spreading it evenly.
- Cover with the second crust. Seal the edges and cut a few small slits to vent steam, or weave a lattice top if you prefer.
- Whisk the egg yolk with the milk and brush it over the top crust.
- Place the pie into the air fryer (you may need to remove the basket to fit it) and cook at 310°F for 10 minutes. Check it and add time as needed — usually about 5 more minutes — until the crust is light golden brown and the filling is bubbling. Timing varies by air fryer wattage and pie thickness.
- Let cool a few minutes before slicing.
Equipment
- Pie Pan
Notes
- Pan fit: Use a pie pan that fits inside your air fryer basket. You may need to remove the basket to lower it in.
- Crust: Store-bought thawed crust keeps this easy, but homemade pie crust works too. Keep the dough chilled until you assemble for the flakiest result.
- Cook time varies: Air fryer wattage and pie thickness affect timing. Start checking at 10 minutes and add time in 2–3 minute intervals until the crust is light golden and the filling bubbles.
- Browning too fast? Loosely tent the top with foil while the filling finishes cooking.
- Cool before slicing: Let the pie rest a few minutes so the filling sets, or it will run.
- Fresh cherries: To swap the canned filling, toss pitted fresh cherries with sugar, cornstarch, and a squeeze of lemon juice.
- Storage: Room temp up to 2 days, fridge up to 5 days, or freeze (baked or unbaked) up to 3 months.
Nutrition
Share this recipe
We can’t wait to see what you’ve made! Mention @forktospoon or tag #forktospoon!